Enlarge a small photo: regular resizing or AI upscaling?
Written · Updated · Operator (individual)
An old photo looks fine as a thumbnail, then turns soft when you use it in a larger layout. Before choosing AI, decide how large it actually needs to be. Making an image occupy more pixels and inventing plausible detail are different jobs, and they need different checks.
When is regular enlargement enough?
Try regular enlargement first when a website needs a minimum width or your layout is only a little larger. It interpolates nearby colors, works quickly and needs no AI model download. The original softness remains, but the method adds fewer opportunities for invented facial details or letter shapes.
AI upscaling uses learned patterns to estimate edges and texture. Hair or fabric may appear more defined, but the new detail can differ from the original. A family photo for display and a document whose numbers must stay accurate are different use cases.
We compared both against known originals
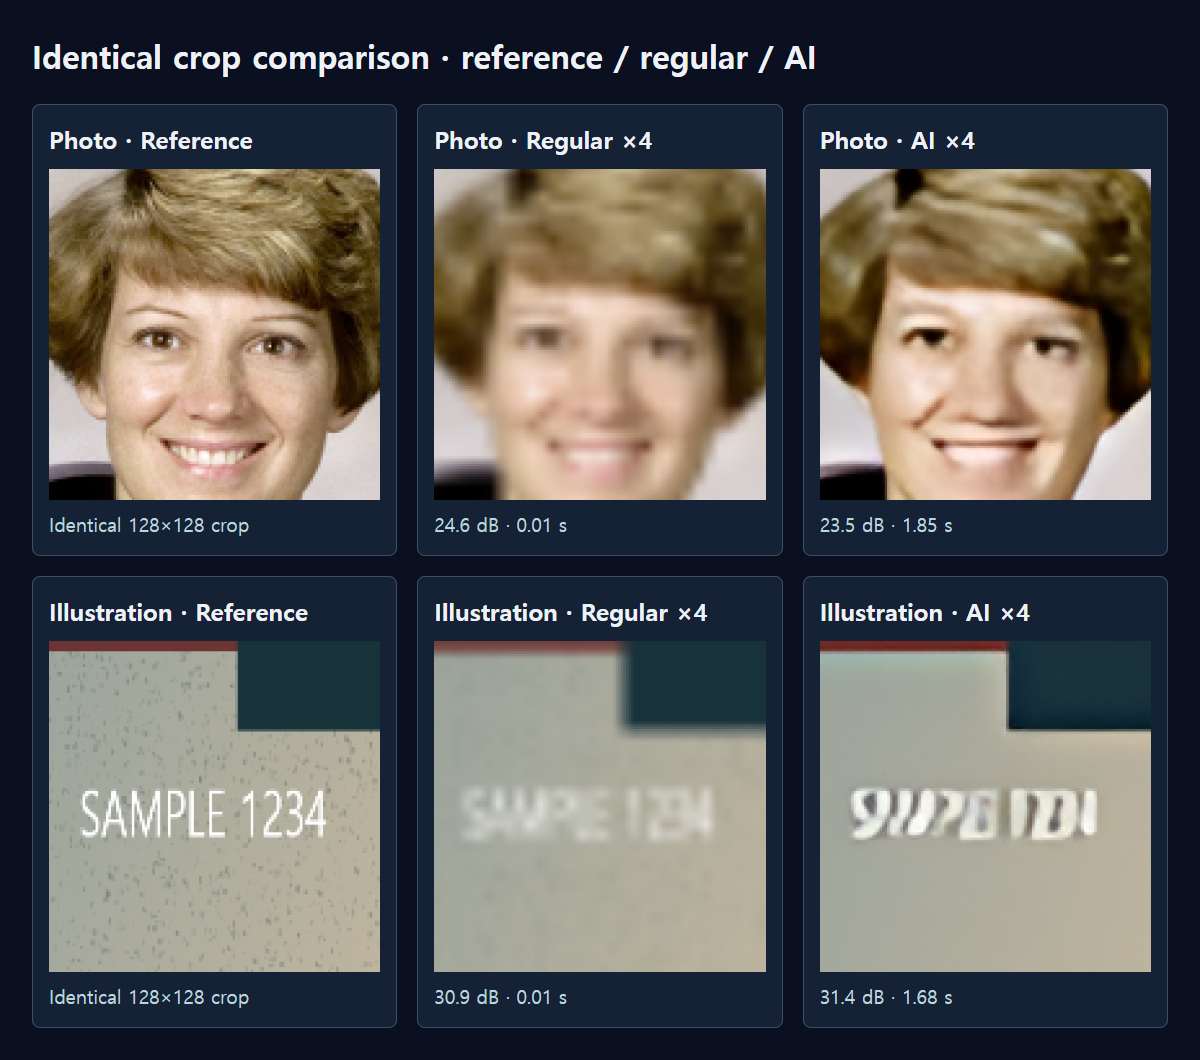
To check fidelity, we needed the original larger images. We used NASA’s public-domain astronaut test photograph and a MiruKit synthetic illustration, each prepared on a 512×512 grid. We reduced them to 128×128, enlarged each by four with the regular method and the photo AI, then compared both outputs with their 512×512 references. The illustration was fitted to a square for this controlled test.
For the photograph, regular enlargement scored 24.6dB and AI scored 23.5dB: the AI output was farther from the reference in pixel color. For the illustration, regular enlargement scored 30.9dB and AI scored 31.4dB, a small improvement across the image. Yet the AI changed “SAMPLE 1234” into different-looking characters. We would reject that result when the lettering matters. Compare the same face and text regions below rather than assuming a higher whole-image score means every detail is right.
The number is PSNR, which measures color differences against a known reference. Higher means smaller pixel differences; it does not decide which image looks more pleasing. Check the same enlarged face and fine marks below. A small file has already lost information, so an attractive reconstruction and an exact reconstruction are different things.
How long did it take?
On the test PC, using Edge and an NVIDIA GPU, the regular method took about 0.01 seconds. AI took 1.85 seconds for the photograph and 1.68 seconds for the illustration. Those AI times include worker and session preparation plus creating the returned PNG, but exclude downloading the model. The input was only 128×128, so these timings do not describe a large photo or a phone.
We used the existing Real-ESRGAN photo model, without adding a new model. In the normal tool, you see a download notice before the required AI file is fetched. The photograph itself is processed on your device. Use the estimate shown before starting, then compare it with the actual elapsed time on your own hardware.
How do I compare the options in MiruKit?
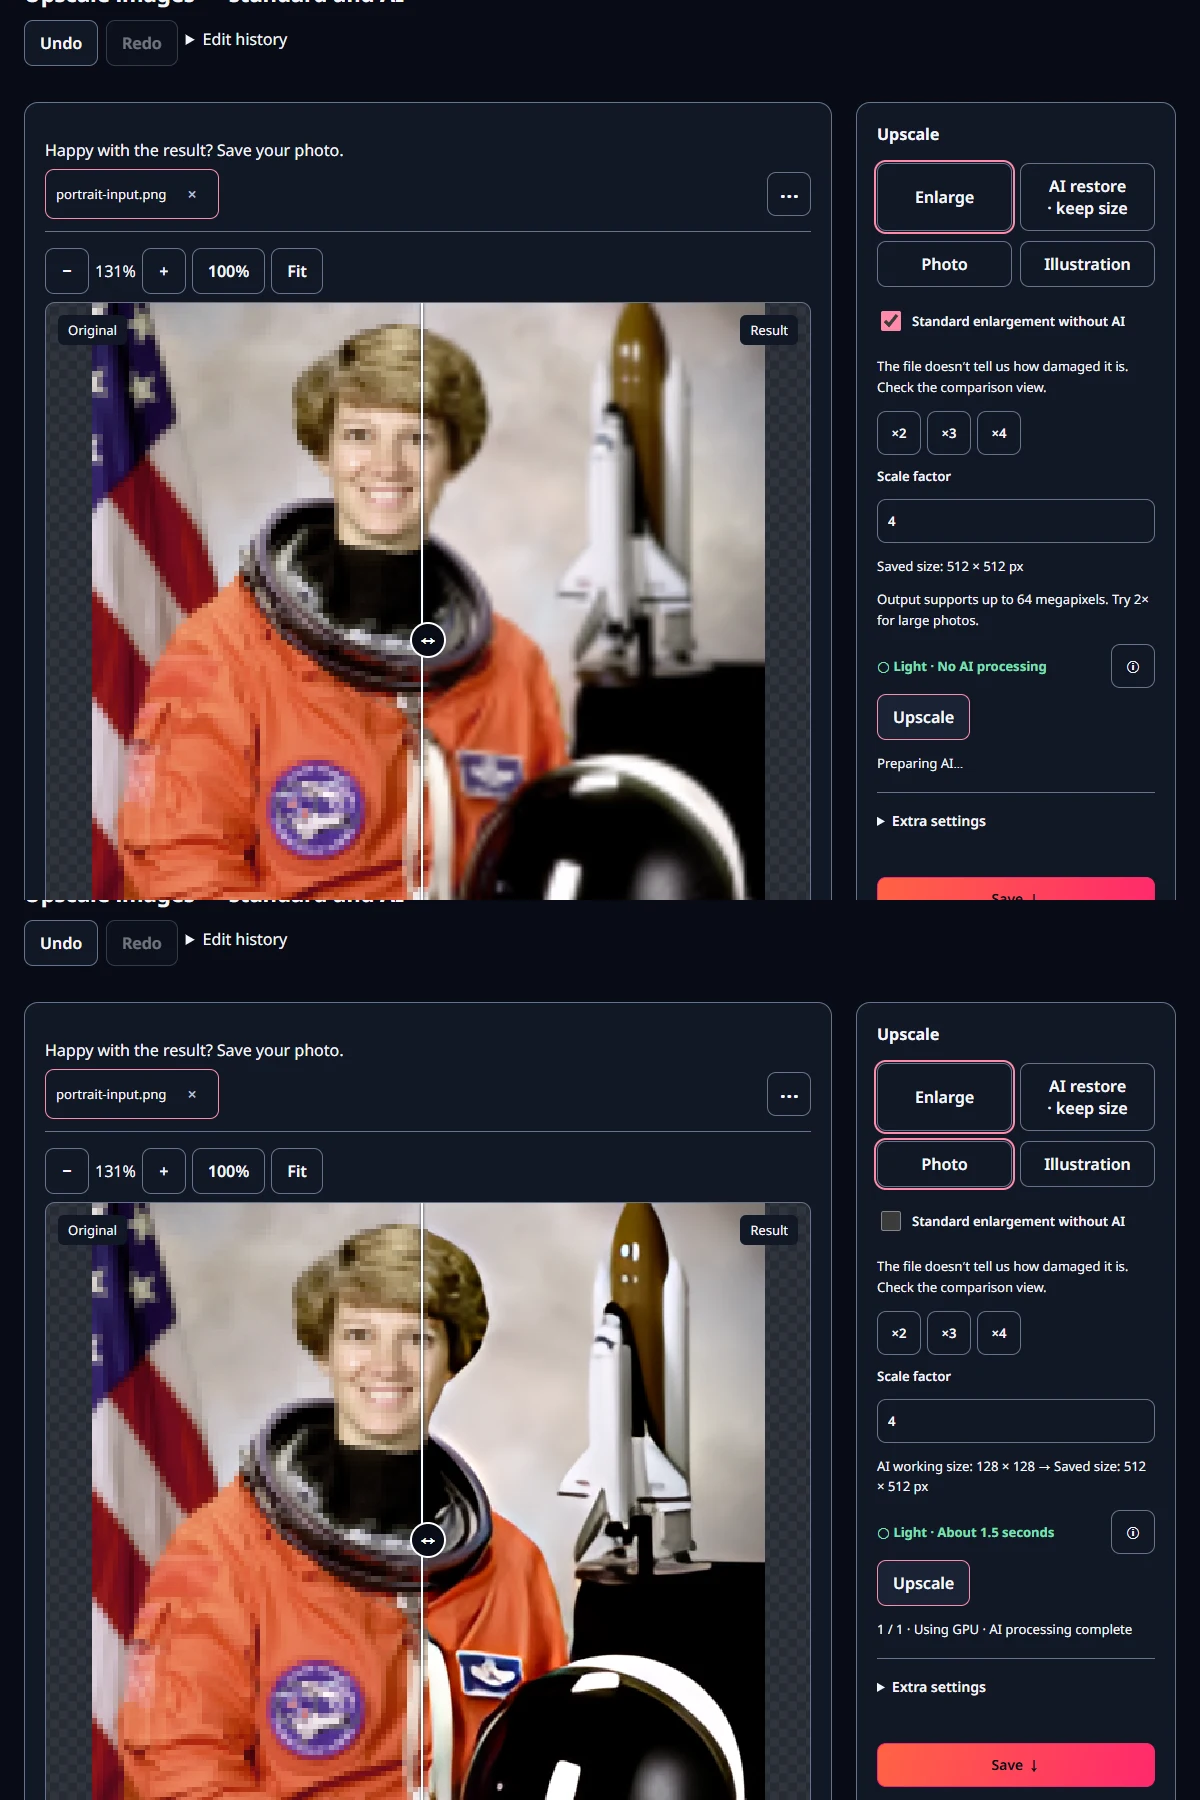
- Open the best original you have in Upscale. Prefer the first file you received over a copy repeatedly sent through messages.
- Choose the enlargement you need and check the regular result first. Doubling width and height creates four times as many pixels.
- Run the photo AI at the same scale after checking its download size and time estimate.
- Look at faces, hands, lettering and logos at actual size. The full-picture view can hide changed details.
- View the result at its final display size and choose the version that suits the task. Finish from the original rather than enlarging an already enlarged copy again.
Will AI make tiny text reliable?
Stronger edges can make a word appear easier to read while changing a stroke or digit. For receipts, contracts or identification numbers, look for a higher-resolution original or take a new photograph. Our test checks image enlargement, not document-reading accuracy.
There is also an illustration option in the tool. The AI column here uses only the photo model, so it does not rank that model against the illustration model. Compare eyes, hair and small patterns in your own file before choosing.
Open the related toolMeasured with MiruKit
| Input / method | Reference similarity | Elapsed |
|---|---|---|
| Photo · Regular | 24.6 dB | 0.01 s |
| Photo · AI | 23.5 dB | 1.85 s |
| Illustration · Regular | 30.9 dB | 0.01 s |
| Illustration · AI | 31.4 dB | 1.68 s |
512×512 reference reduced to 128×128, then enlarged ×4. Full RGB PSNR: higher means closer reference colors. Photograph: NASA/scikit-image public domain; illustration: MiruKit synthetic. PC Edge/NVIDIA WebGPU FP16 times exclude model download but include preparation and returned PNG creation.
Good to know
AI estimates new detail. Check the receiving organization’s editing rules before using it for identity photos or official documents.
These measurements cover two inputs on one PC. They are neither a universal quality ranking nor phone processing times.
Official sources
Sources checked 2026-10-15