Brighten a dark photo: Exposure or Shadows first?
Written · Updated · Operator (individual)
You took a photo beside a window, but the person looks much darker than the view outside. Raising the brightness fixes the face and turns the window white. Try Shadows first when one part of the picture is dark; use Exposure when the whole picture needs more light.
Is the whole photo dark, or just your subject?
Pick one area you want to improve before moving a slider. If the room, the face and a white wall all look dull, a small increase in Exposure is a useful start. If the sky already looks bright and only a face or jacket is hard to see, start with Shadows instead. The goal is a comfortable picture, rather than a particular average brightness.
Exposure brightens the image broadly. Shadows has more effect on darker tones and less on bright ones. It also affects some middle tones, so it is a gradual adjustment rather than a selection around your subject. Thinking of the controls as two different jobs makes them easier to combine.
What changed in our test?
We made a 960×600 illustration with a dark room and a bright window. This is a controlled example, not a camera photograph. We ran MiruKit’s current adjustment code and measured the displayed color values before file encoding.
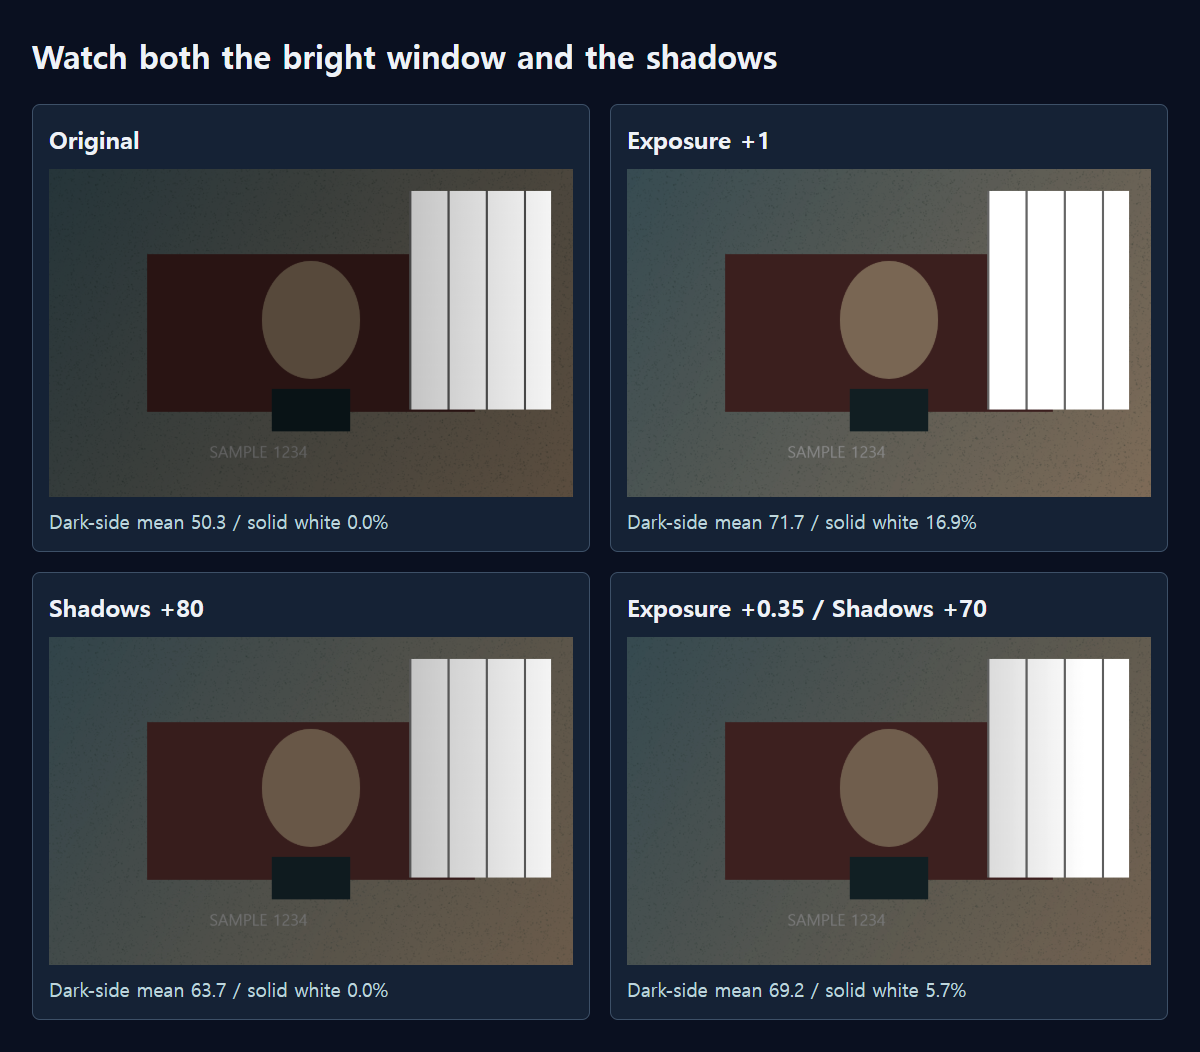
At Exposure +1, the dark-side average rose from 50.3 to 71.7 on a 0–255 scale. However, 16.9% of the picture became completely white. At Shadows +80, the dark-side average reached 63.7 without any completely white pixels. For this scene, Shadows is our first choice because it keeps the window while making the darker area easier to see.
We also tried Exposure +0.35 with Shadows +70. The dark-side average reached 69.2, but 5.7% of the picture became completely white. Combining controls was brighter, but it still lost some highlight detail. Look at the window lines in the comparisons below as well as the numbers. A color average describes what changed; it does not rate how attractive a photo looks.
How should I adjust my own photo?
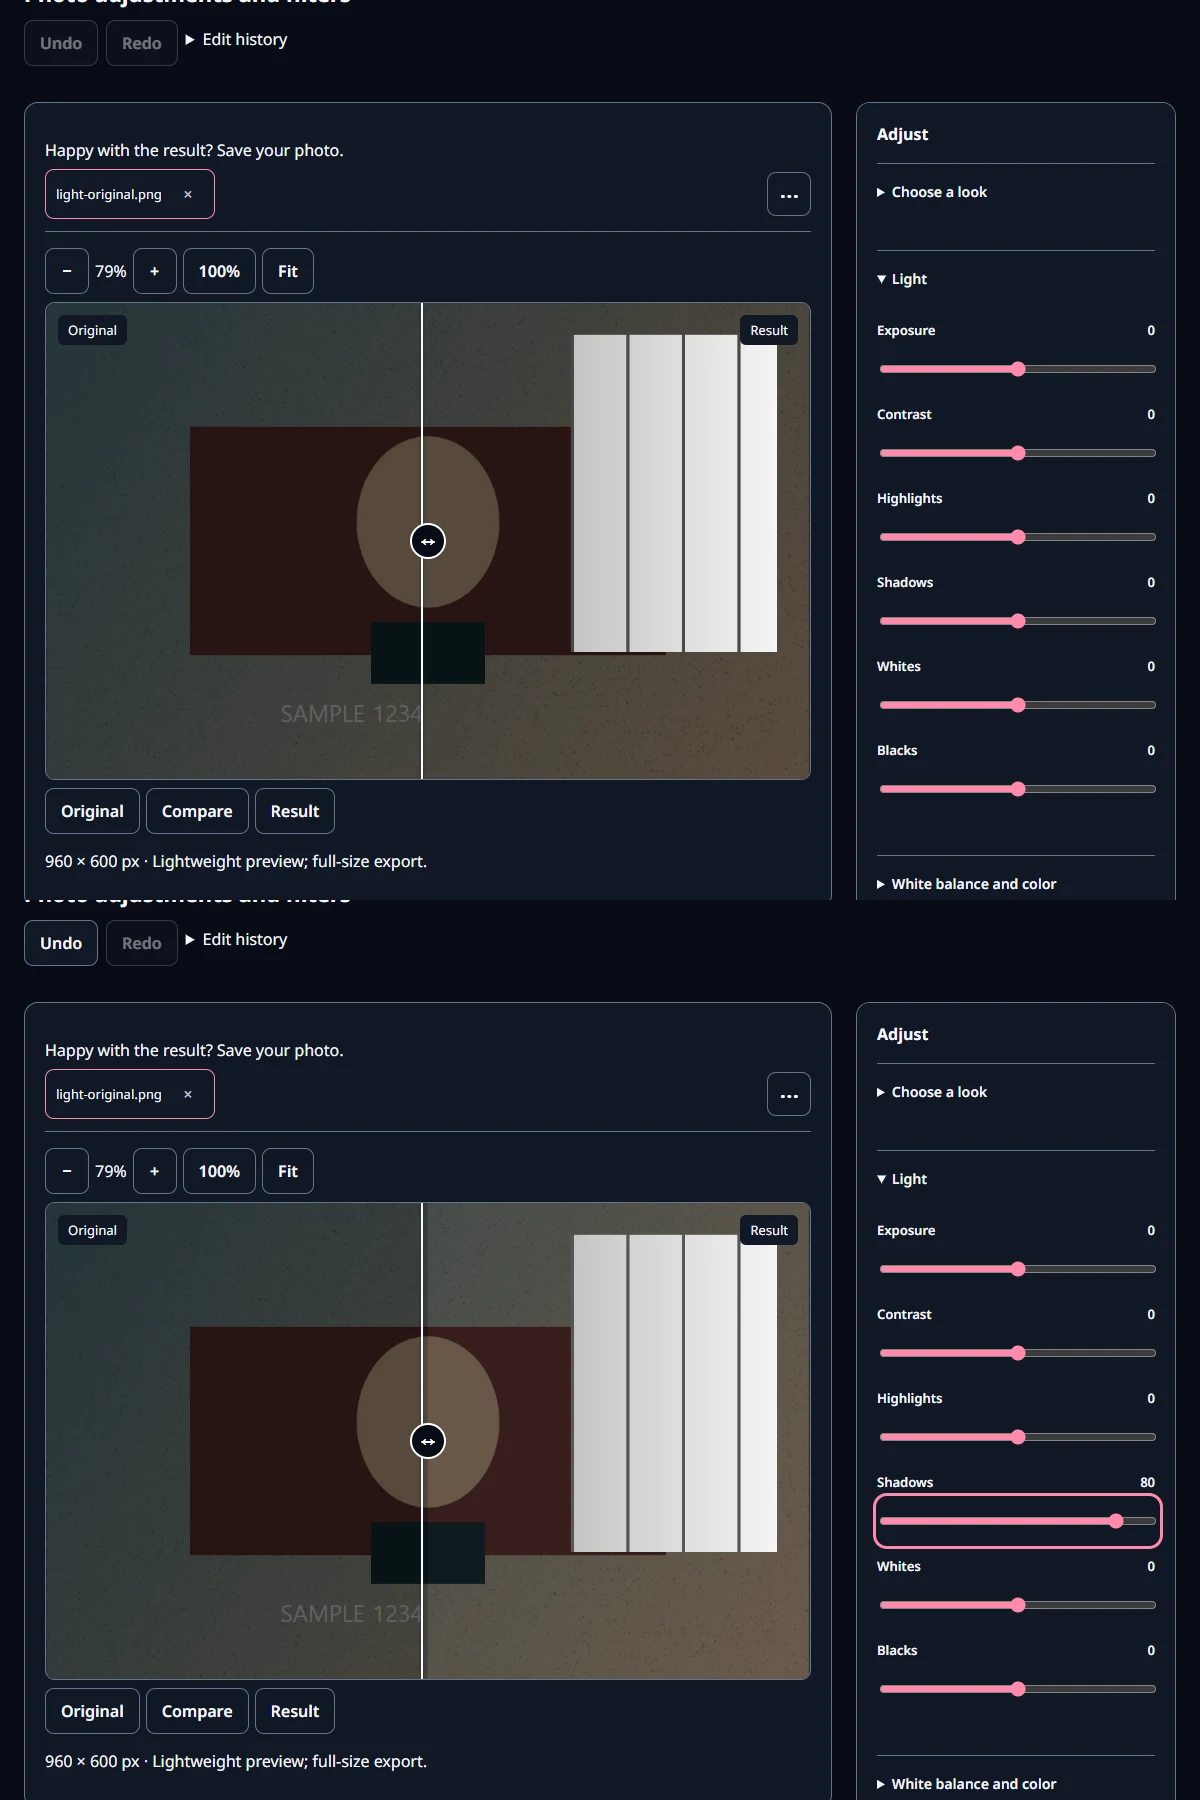
- Open the original in MiruKit’s photo adjustment tool. Start without a preset so you can see what each control does.
- In Light, move Exposure a little while watching both your subject and the brightest part of the scene.
- Raise Shadows until the important dark detail is visible. The +80 used in our test is an example setting, not a default for every photo.
- Check white clothing, clouds and windows. If they lose detail, lower Exposure and try a small reduction in Highlights.
- Zoom to actual size to inspect skin and dark walls, then save a separate copy and open the saved file.
Use the full-picture view to judge brightness and the enlarged view to judge roughness. A small preview can hide noise. Finishing the adjustment from the original also avoids repeatedly opening and saving already compressed copies.
Why did brightening reveal speckles?
Noise hidden in the dark area becomes more visible when you brighten it. First reduce Shadows a little. If the speckles still distract, try a modest amount of Noise reduction in Details. Stop before skin or fabric loses its texture. There is often a useful middle ground between a perfectly bright corner and a natural-looking subject.
An area that was already saved as solid white has a different problem: there is no remaining cloud or fabric pattern in those pixels to reveal. If you have a better original, use it. These controls are most useful when color differences are still present but too dark to see comfortably.
The photo is brighter, but still yellow. What next?
Warm indoor lighting can leave a yellow cast after the brightness is corrected. Try a slightly cooler Temperature in Color balance instead of adding more Exposure. Work on light first, then color, so you can tell which change helped.
Finally, look at the size your audience will actually see. A photo in a message and the same photo filling a large monitor show noise differently. You may prefer leaving a little natural darkness rather than bringing every corner up to the same brightness.
Open the related toolMeasured with MiruKit
| Setting | Dark-side mean | Solid white |
|---|---|---|
| Original | 50.3 | 0.0% |
| Exposure +1 | 71.7 | 16.9% |
| Shadows +80 | 63.7 | 0.0% |
| Exposure +0.35 / Shadows +70 | 69.2 | 5.7% |
Synthetic 960×600 scene. Dark-side mean is the display RGB average (0–255) across the left 65%; solid white means all three channels are 255. Same shipped WebGPU adjustment code.
Good to know
The measured settings come from one synthetic illustration. Camera photographs with different lighting will respond differently.
Check noise and highlight detail before saving. Keep the original and give the edited copy a different name so you can return to it later.
Official sources
Sources checked 2026-10-15